 |
How to Calibrate Mexican Topo Maps with Oziexplorer's registered version |
|
To manually calibrate a Mexican topographic map in Oziexplorer you need to provide the coordinates of at least 2 known points (I recommend to use 3 to 4 points to increase accuracy). Once you enter this information Oziexplorer will generate the Map file that will allow you to work with your GPS. You need to choose the coordinate system that will be used to obtain the points information.
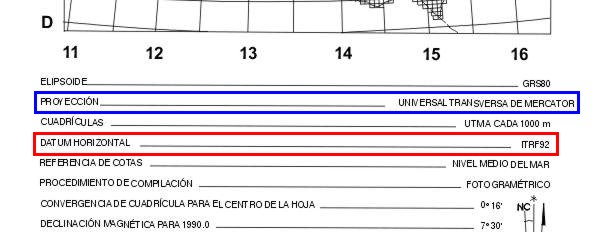
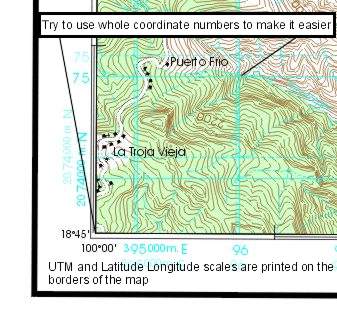
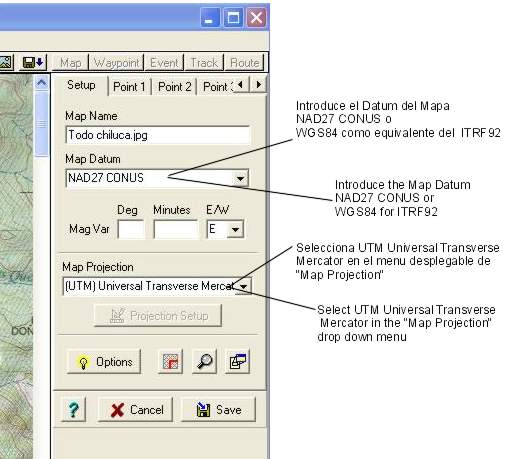
The coordinate scales for both Lat/Lon and UTM are printed on the borders of the map. The map Datum is located in the information section of the map as shown below in the red rectangle. Mexican maps are made in 2 datums: ITRF92 (which is the same as WGS84) or NAD27 CONUS. It is identified in Spanish as “Datum Horizontal”. See below . All Mexican topo maps in the 1:50,000 and 1:250,000 scales are made in UTM projection as shown in the blue box.
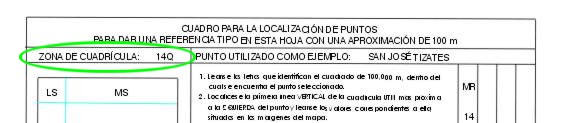
If you decide to use UTM, besides the datum you will need the UTM zone in which the map lies. You can find it in a table like the one shown below in green:
From the original paper map identify 3 to 4 points that are within the scanned area. Look for points that have whole number coordinates in the system you decided to use and close to the corners of the scanned area to help minimize errors and to make the process easier. Make sure to write the complete coordinate number for each point and write them down.
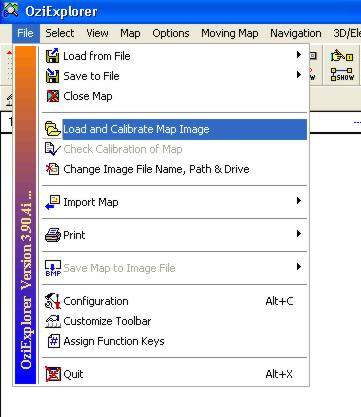
Start Oziexplorer and choose File/Load and Calibrate Map image.
Browse to the directory where the image you want to calibrate is stored and open it. The map image will show on the left side of the screen and the calibration window on the right side. On the “Setup” tab enter the required information: the datum from step 2 above ( If the map datum is ITRF92 on the map use WGS84 in Oziexplorer), and select “(UTM) Universal Transverse Mercator”, on the map “Projection” drop down menu.
Then select the “Point 1” tab and the cursor will take a cross shape. Locate the cursor over the first point of which you know the coordinates (step 4 above) and click. Enter the coordinates in the corresponding fields of the calibration window. If you are using UTM you will need to enter the zone, easting and northing. If you are using Lat/Long you will be asked to enter these two values. DO NOT PRESS THE SAVE BUTTON.
Now select the “Point 2” tab and repeat the process mentioned above for the second point. Repeat for all the points identified in step 4 above. Once all the points have been entered press SAVE and name your map. Your new map is ready for use. If you need more information on this process check Oziexplorer’s help.
Alberto Nájera Julio, 2003
|